How to Handle Perishables and Plants

How to Handle Perishables and Plants

Keep your items fresh and alive on the move.

cross country movers

To handle perishables and plants safely, you'll need temperature-controlled equipment and proper packaging materials. Use airtight containers and maintain temperatures between 35-40°F for perishables, while wrapping plant root balls in damp newspaper and plastic. Keep raw meats separate from other items, and secure all cargo to prevent movement during transit. Clean all surfaces before and after transport, and monitor temperatures consistently. The success of your transport depends on understanding the specific requirements for each item type.

Essential Equipment and Supplies for Safe Transport
essential transport equipment supplies

Success in transporting perishables and plants relies heavily on having the right equipment and supplies at your disposal.

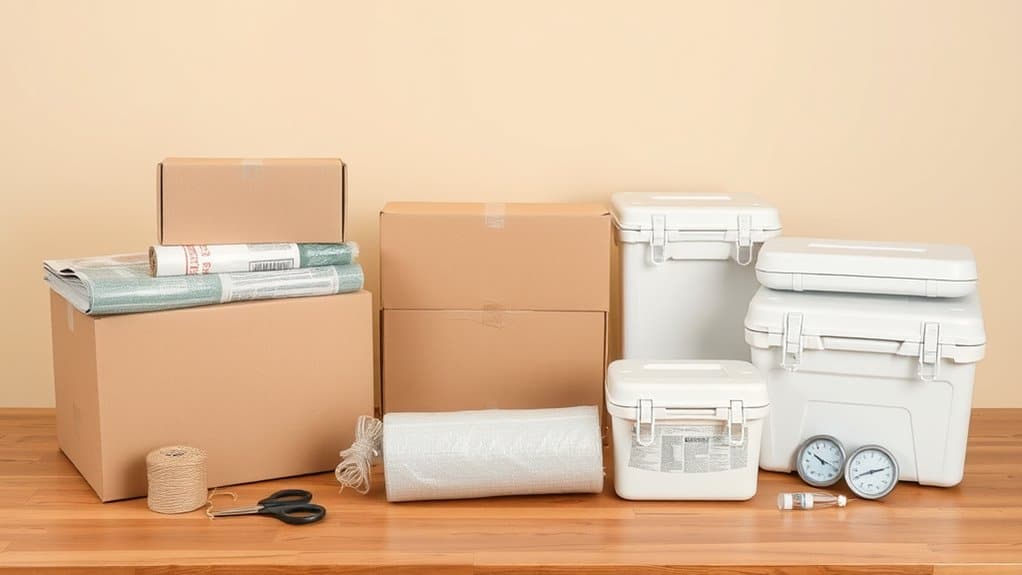
The essential equipment you'll need includes stainless steel vehicles with proper insulation, secure anchoring systems, and durable linings to protect your cargo from contamination and damage during transit.

Your packaging materials should feature airtight containers and moisture-resistant wrapping to maintain ideal conditions for your goods.

Don't forget to use shock-absorbing inserts for fragile items and pest-resistant materials to prevent infestations.

You'll also need proper handling equipment like pallets, straps, and anti-skid mats to keep your cargo stable.

For safe loading and unloading, make sure you're equipped with forklifts and dollies.

Remember to maintain cleanliness with sanitizable containers and appropriate cleaning supplies.

Temperature Control During Transit

When transporting perishables and plants, you'll need to master cold chain basics that maintain specific temperature ranges throughout the journey.

You can protect your cargo by using appropriate temperature-controlled equipment, such as reefer trucks for fresh produce (0-8°C) or dry ice solutions for frozen items (below -20°C).

Time-temperature monitoring is essential, so you'll want to implement IoT sensors and automated logging systems to track any deviations and guarantee your shipment stays within safe temperature zones from pickup to delivery.

Cold Chain Basics

Maintaining precise temperature control throughout transit stands as the cornerstone of effective cold chain management.

You'll need to understand the essential components that guarantee your perishables arrive safely at their destination. Cold chain importance can't be overstated, as proper temperature monitoring prevents product loss and maintains quality.

  • Use wireless sensors and IoT devices to track real-time temperature data during transport
  • Implement both active cooling systems (refrigeration units, dry ice) and passive methods (thermal blankets, gel packs)
  • Install cloud-based monitoring platforms to detect and respond to temperature fluctuations quickly
  • Follow strict documentation protocols to maintain compliance with regulatory requirements
  • Conduct regular validation testing of packaging integrity and temperature control systems

Remember to combine these elements strategically, as each plays an essential role in maintaining your cold chain's integrity.

Time-Temperature Safety Tips

Three critical components form the foundation of effective temperature control during transit: robust monitoring systems, proper cooling methods, and reliable packaging solutions.

To prevent temperature spikes during transport, you'll need to place monitoring devices at strategic points within your containers. These data loggers provide real-time tracking and alert you to any fluctuations that could compromise your shipment.

Make sure you're using mechanical refrigeration as your primary cooling method, supplemented with phase-change cold packs when needed. Your packaging should include insulated containers with moisture-resistant seals and reflective liners.

Remember to train your team on temperature data interpretation and establish clear threshold limits. Keep backup cooling supplies ready, and always verify temperatures at transfer points to maintain the cold chain's integrity throughout the journey.

Proper Packing Methods for Plants

When you're shipping plants, you'll need to start with properly securing the root ball by wrapping it in damp newspaper and securing it with plastic wrap to maintain essential moisture.

Your choice of container matters greatly, so select sturdy corrugated boxes with proper partitioning to prevent movement and protect multiple plants during transit.

You'll also want to guarantee your shipment uses climate-controlled transport methods, keeping temperatures stable while maintaining appropriate humidity levels throughout the journey.

Secure Root Ball Wrapping

Secure root ball wrapping serves as the foundation for successful plant transportation and transplantation. When you're preparing root balls, it's crucial to use proper wrapping materials and techniques to guarantee plant survival.

You'll need to carefully select biodegradable burlap and reinforced twine while maintaining controlled tension throughout the process.

Here are the key steps for effective root ball wrapping:

  • Apply the drum lace method with star-shaped patterns for large root balls
  • Secure twine to trunk loops rather than directly on stems
  • Use moisture-managed burlap to prevent root desiccation
  • Implement proper tension control to avoid restricting root growth
  • Test root ball firmness before finalizing the wrap

Remember to remove any non-biodegradable materials before planting and trim excess burlap above the soil line to prevent water retention issues.

Plant Container Selection

Beyond wrapping root balls, successful plant transportation depends heavily on selecting the right containers and implementing proper packing methods.

You'll need to choose containers based on your plants' specific requirements, considering both container aesthetics and essential drainage solutions. Select durable materials like plastic, ceramic, or wood that'll maintain structural integrity during transport.

For root vegetables, opt for deep cylindrical containers, while climbing plants need tall, vertical options.

Don't forget to incorporate proper drainage holes to prevent waterlogging. When packing, fill containers halfway with moist soil mixed with time-release fertilizer, then add your plants and secure them with additional soil.

Leave about 8 inches of space for root expansion, and arrange plants using the thriller-filler-spiller method for ideal stability and visual appeal during transport.

Climate-Controlled Transport Methods

The successful transport of plants requires carefully controlled climate conditions throughout their journey. To maximize transport efficiency, you'll need to maintain temperatures between 65-75°F while managing humidity levels effectively. Climate control systems guarantee your plants arrive healthy and stress-free.

Key elements for successful plant transport include:

  • Use climate-controlled vehicles with temperature monitoring systems
  • Pack roots in damp materials and maintain proper spacing between plants
  • Secure containers with anti-vibration mats to prevent tipping
  • Water plants 1-2 days before transport, avoiding in-transit watering
  • Implement real-time monitoring for temperature and humidity control

For longer journeys, opt for specialized truckload services rather than LTL shipping to maintain consistent conditions. This approach minimizes handling and helps preserve plant quality throughout the transportation process. Additionally, understanding state and federal regulations regarding plant transport can prevent potential fines and ensure compliance during your move.

Storage Guidelines for Perishable Foods

Proper storage of perishable foods plays a critical role in maintaining food safety and quality. Your refrigerator organization should prioritize keeping raw meats separate from other items, and you'll need to maintain temperatures between 35-40°F for ideal preservation.

When it comes to freezer management, guarantee a constant temperature of 0°F and use freezer-safe containers to prevent freezer burn.

You'll want to check storage labels carefully and refrigerate perishables immediately after purchase. Store raw meat, poultry, and dairy products separately to avoid cross-contamination, and don't forget to seal open items in airtight containers.

If you're dealing with leftovers, refrigerate them within two hours of preparation. For shelf-stable items that you've opened, like peanut butter, they'll need refrigeration to maintain freshness.

Vehicle Preparation and Loading Strategies
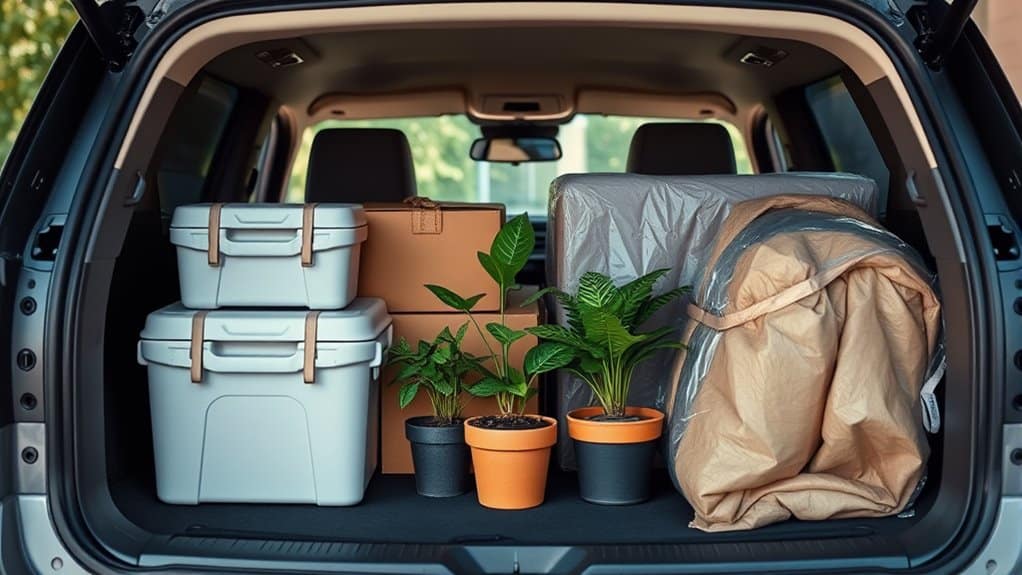
safe perishable transport strategies

Successful transport of perishables and plants requires thorough vehicle preparation and strategic loading procedures. Before loading any items, you'll need to complete extensive vehicle inspections and implement proper pest management protocols to guarantee food safety compliance.

  • Sanitize all surfaces, including refrigeration units and floors, between shipments.
  • Check seals, insulation, and cooling systems for proper functionality.
  • Apply pest control measures and seal potential entry points.
  • Use tamper-evident packaging and segregate different food types.
  • Monitor temperature controls and install tracking devices.

When loading your vehicle, start with temperature-sensitive items first and stack heavier items near the floor.

You'll want to maintain separate zones for raw and ready-to-eat products to prevent cross-contamination.

Remember to document load positions and use rigid packaging materials to protect against movement during transit.

Time Management and Route Planning

Once your vehicle is properly prepared and loaded, mastering time management and route planning becomes your next major focus.

You'll need to analyze traffic patterns, weather conditions, and potential road closures to optimize your route efficiency. Using real-time tracking systems, you can quickly adjust your course when delays occur.

Your delivery scheduling should prioritize routes with minimal stops to protect temperature-sensitive items.

When planning your timeline, build in buffer periods for unexpected disruptions and allocate shorter delivery windows for high-risk perishables.

You'll want to coordinate closely with recipients to confirm dock availability and reduce waiting times.

For cross-border shipments, prepare your customs documentation in advance and familiarize yourself with regional regulations.

Remember to monitor loading and unloading durations carefully to maintain proper temperature conditions throughout the journey.

Unpacking and Post-Move Care

After completing your delivery route, careful attention to unpacking and post-move care will protect your perishables and plants from damage.

A thorough post-move inspection guarantees your items remain safe for consumption and your plants adapt to their new environment. Start with these essential steps:

  • Clean all storage containers and surfaces before restocking perishables
  • Transfer refrigerated items immediately to maintain proper temperature
  • Check expiration dates and discard any compromised items
  • Acclimate plants gradually to new lighting conditions
  • Monitor plant health for signs of stress or damage

Focus on food safety by storing items at appropriate temperatures and preventing cross-contamination.

Sort your pantry items by category, keeping frequently used items accessible.

For plants, maintain consistent watering schedules and avoid sudden environmental changes that could shock their systems.

Conclusion

Just like nurturing a delicate flower, handling perishables and plants requires careful attention to detail. You've now got the fundamental knowledge to maintain freshness and liveliness during transport. By following these temperature control, packing, and storage guidelines, you'll guarantee your items arrive in prime condition. Remember, success lies in thorough preparation and proper timing. Put these strategies into practice, and you'll master the art of transporting sensitive cargo safely and efficiently.

For your first week in NYC, you'll need essential digital and physical preparations. Start by activating a local SIM or eSIM, downloading transit apps like Citymapper, and storing encrypted copies of important documents. Pack weather-appropriate layers, keep emergency contacts handy, and set up an OMNY payment card for public transportation. Don't forget to locate nearby grocery stores, healthcare facilities, and your local NYPD precinct. The city's extensive guide reveals more strategies for a smooth changeover.

Setting Up Your Phone and Transit Apps

set up phone connectivity

When planning your move to New York City, setting up reliable phone connectivity should be your first priority.

You'll need to decide between physical SIM activation or eSIM options, depending on your device's carrier compatibility. For Samsung S21 Ultra or newer iPhones, eSIMs offer flexible data monitoring without physical card swaps.

Before arrival, check your phone's compatibility with local networks and consider pre-purchasing SIMs to avoid airport markups.

Once you're set up, download essential transit apps and enable Wi-Fi calling for areas with weak signals.

Don't forget to implement mobile security measures and establish backup solutions for your photos through Google Photos syncing.

To avoid expensive roaming charges, activate your local SIM or eSIM immediately upon landing - you'll need reliable data for maneuvering the city's transit system.

Essential Documents and Paperwork

When settling in New York, you'll need a secure system for both digital and physical copies of your essential documents, including identification, immigration papers, and proof of residency.

Store physical documents in a waterproof, fireproof container at home, while keeping encrypted digital copies on a secure cloud service and an external hard drive for backup.

You'll want quick access to important travel IDs like your passport, driver's license, and IDNYC card, especially when traversing the city's various security checkpoints and administrative offices.

Digital Copies and Backups

Protecting your essential documents through digital backups isn't just a convenience - it's a crucial step for your move to New York. Your digital organization strategy should include secure cloud storage and encrypted portable drives for quick access to important paperwork.

Implement backup strategies that keep your documents safe while ensuring they're readily available when needed.

  • Store scanned copies of your ID, passport, and social security card in password-protected cloud folders
  • Create digital archives of rental agreements and utility accounts for easy reference
  • Maintain encrypted USB drives with medical records and insurance information
  • Set up automated reminders for document expiration dates
  • Keep synced backups across your devices for seamless access during your relocation

Physical Document Storage Solutions

Three essential storage solutions guarantee your vital documents remain secure and accessible in New York.

First, opt for climate-controlled storage units that protect your papers from temperature fluctuations and humidity damage. These facilities maintain consistent conditions, preventing deterioration of important documents like contracts, photos, and legal papers.

Second, confirm your storage provider offers multi-layer security features, including 24/7 surveillance, encrypted access controls, and professional security personnel.

Finally, choose a facility that provides flexible document retrieval options, allowing you to access your materials through physical pickup or next-day delivery when needed.

Remember to verify that your chosen storage solution maintains PRISM Privacy+ certification and offers secure destruction services for when you need to dispose of sensitive documents properly.

Key Travel Identification Forms

Beyond storing your documents securely, you'll need to have the right identification forms ready for travel in New York.

Starting May 7, 2025, you'll require a REAL ID-compliant credential or acceptable alternative for domestic flights and federal facility access. Plan ahead by gathering your essential travel documents and visiting the DMV for your REAL ID application.

  • Original Social Security card or W-2 form showing your complete number
  • U.S. passport or certified birth certificate to prove identity
  • Two recent documents (within 60 days) proving NY residency
  • Current out-of-state license if you're transferring from another state
  • Permanent resident card or visa documentation for non-U.S. citizens

If you're under 18, you won't need ID when traveling with a compliant adult, but it's still wise to carry identification.

New York's diverse neighborhoods offer unique experiences that shape your daily life in the city. You'll discover distinct local cuisine options, from Italian restaurants in Morris Park to Caribbean eateries in Prospect-Lefferts Gardens.

Community events, like Morris Park's Columbus Day Parade, help you connect with neighbors and build relationships.

To navigate efficiently, familiarize yourself with nearby subway lines and transportation options. If you're near Prospect-Lefferts Gardens, you'll have access to the Q, 2, 5, and B lines.

Consider your neighborhood's proximity to green spaces - Windsor Terrace residents enjoy walkable access to Prospect Park, while Throgs Neck offers waterfront activities.

Research your local NYPD precinct and emergency services, noting that areas like Morris Park and Throgs Neck rank relatively well for safety in NYC.

Weather-Ready Wardrobe Basics

Living in New York City demands a versatile wardrobe that adapts to the city's unpredictable weather patterns. Mastering weather layering is essential, starting with breathable base layers and adding insulating mid-layers for temperature fluctuations. Your fabric choices should prioritize moisture-wicking materials that keep you comfortable during humid summers and rainy springs.

  • Lightweight, convertible jackets with zip-off sleeves for seamless shifts between morning chill and afternoon warmth
  • Quick-dry pants paired with waterproof boots to navigate unexpected rain showers
  • UV-protective accessories including wide-brimmed hats and sunglasses for intense midday sun
  • Breathable sneakers with moisture-wicking socks for extensive city walking
  • Compact umbrellas and rain-resistant bags that fit easily in your daily carry

Safety and Emergency Contacts

You'll need quick access to essential emergency contacts in New York City, including the universal 911 for immediate police and fire response, and 311 for non-emergency city services.

It's vital to save local numbers like the Building Emergency line (718-721-0700 during business hours, 1-800-352-1486 after hours) and nearby hospitals (Parkway: 718-990-4100, North Shore: 718-830-4000) in your phone's contacts.

For additional peace of mind, you should create an emergency kit with basic supplies and keep a printed list of these important numbers in case your phone isn't accessible.

Important Local Contact Numbers

Three essential emergency numbers form the backbone of New York City's safety response system, with 911 serving as the primary contact for immediate police and fire emergencies.

You'll want to store these local emergency contacts and community service numbers in your phone, as they're vital for maneuvering through various situations in the city.

  • 311 connects you to non-emergency city services, from noise complaints to street cleaning inquiries
  • Poison Control (212-340-4494) provides immediate assistance for exposure to harmful substances
  • Con Edison (212-487-4444) handles power outages and gas emergencies
  • The Domestic Violence Hotline (800-621-4673) offers 24/7 crisis intervention
  • Building Emergency services (718-721-0700) address structural and maintenance issues during business hours

Keep these numbers handy—they're your lifeline to essential services throughout the five boroughs.

Emergency Kit Essentials

While emergency contacts are essential, maintaining a well-stocked emergency kit in your New York home forms the foundation of disaster preparedness.

Your emergency kit should include one gallon of drinking water per person daily, non-perishable foods, and a manual can opener. Store these items in an easily accessible container, along with critical safety supplies like a first aid kit, flashlight, extra batteries, and a battery-operated radio.

Don't forget to pack important documentation, including copies of prescriptions, emergency contacts, and a small regional map.

If you have children or pets, include specialized items like diapers, formula, pet food, and comfort items.

For water safety, keep iodine tablets and unscented bleach with an eyedropper, but only use bleach when authorities direct you to do so.

Public Transportation Know-How

New York City's expansive public transportation network stands as one of the world's most extensive systems, connecting millions of residents and visitors across the five boroughs.

You'll need to master subway etiquette, navigate bus routes, check ferry schedules, plan airport transfers, and learn commuter tips to move efficiently through the city.

Here's what you'll encounter daily:

  • 24/7 subway service across 472 stations, with express and local trains running on colored-coded lines
  • OMNY contactless payment system working seamlessly on buses and trains
  • Real-time tracking through apps like Citymapper and MTA Bus Time
  • Free Staten Island Ferry service connecting Manhattan to Staten Island
  • Direct airport connections via AirTrain to JFK and LaGuardia, plus rail service to Newark

Remember to download essential apps and keep your payment method ready before starting your journey.

Banking and Payment Methods

You'll want to set up popular mobile payment apps like Apple Pay, Google Pay, or Venmo before exploring NYC's diverse payment landscape.

Make sure you've mapped out your bank's ATM network locations across the city to avoid unnecessary fees, and consider using Capital One 360 or Charles Schwab for fee-free withdrawals.

For added security, it's smart to carry multiple cards stored separately, ensuring you're never stranded if one gets lost or stolen.

Mobile Payment Apps Setup

Setting up mobile payment apps in New York City has become an essential step for managing daily transactions efficiently. Following current mobile payment trends, you'll want to prioritize apps that offer both security and convenience.

Start with Apple Pay or Google Pay for contactless payments, then add Cash App for peer-to-peer transfers. For parking tickets and fines, download NYC Pay or Dispute to handle municipal payments seamlessly.

Key app security tips to implement:

  • Enable biometric authentication (fingerprint or face recognition)
  • Use unique, strong passwords for each payment app
  • Set up transaction notifications for real-time monitoring
  • Download apps only from official sources (App Store/Google Play)
  • Keep your phone's operating system and payment apps updated

These measures will help protect your financial transactions while maneuvering through NYC's digital payment landscape.

ATM Network Access Tips

Three key ATM networks in New York City provide essential cash access points for residents and visitors.

You'll find Allpoint ATMs in major retailers like Target, Walgreens, and CVS, while traditional bank networks including Chase, Citibank, and Bank of America offer extensive coverage throughout the city.

Urban ATM placements in airports, malls, and office buildings guarantee convenient access.

For fee avoidance, stick to your bank's network or Allpoint ATMs, which partner with many banks for surcharge-free transactions.

Avoid standalone ATMs in hotels and nightclubs, as they often charge up to $7 per withdrawal.

When you need cash for bodegas or street vendors, plan ahead and withdraw from in-network locations.

Remember that while most businesses accept cards, NYC law requires all vendors to accept cash payments.

Multiple Card Safety Strategies

While visiting New York City requires careful planning, implementing multiple card safety strategies stands as a critical priority for protecting your finances.

Your card security approach should include backup strategies that protect against theft and fraud while ensuring continuous access to funds during your stay.

  • Keep your primary credit card separate from backup cards by storing them in different secure locations.
  • Use an RFID-blocking wallet to prevent electronic pickpocketing in crowded subway stations.
  • Store digital copies of your cards' front and back in an encrypted cloud service.
  • Carry a mix of payment methods, including an emergency-only credit card with a separate account.
  • Set up instant mobile alerts for all transactions to quickly detect unauthorized charges.

These measures will help safeguard your finances throughout your New York adventure.

Must-Have Mobile Applications

essential nyc travel apps

Maneuvering New York City becomes considerably easier when you've got the right mobile apps at your fingertips. For ideal travel efficiency, start with navigation essentials: Citymapper for real-time subway updates, and Google Maps for thorough city navigation.

Download Eric's Offline Subway Map as a backup when you're without internet connection.

For dining and attractions, you'll want Yelp's verified restaurant reviews and Tripadvisor's NYC Go integration for curated trip planning. These app recommendations will help you locate everything from top-rated restaurants to public restrooms.

Don't forget to install AirBnB for accommodation options and Eric's New York Ticket Purchases for discounted attraction entries. With these apps loaded on your phone, you'll navigate the city like a seasoned local.

Local Shopping and Services

New York City's shopping scene offers an unmatched array of retail experiences, from world-famous luxury districts to hidden vintage gems.

You'll find luxury retail along Fifth and Madison Avenues, while trendy shops and local boutiques line the streets of SoHo and the Flatiron District.

For budget options and vintage finds, head to Canal Street and Orchard Street, where street vendors and unique stores await.

Don't miss the artisanal markets and cultural shopping experiences at Chelsea Market and Essex Street Market.

  • Browse designer boutiques at Bergdorf Goodman's ornate showrooms
  • Explore SoHo's cobblestone streets lined with contemporary art galleries
  • Discover unique treasures at Union Square's weekend farmers' market
  • Hunt for vintage clothing in East 9th Street's eclectic shops
  • Sample local delicacies at Chelsea Market's food halls and artisan stalls

Packing Smart for Daily Adventures

Successfully steering through daily adventures in NYC requires strategic packing that balances comfort, functionality, and style.

Start with versatile clothing choices: lightweight, breathable fabrics that adapt easily from day to night activities. Pack quick-drying socks and comfortable walking shoes for extensive exploration.

Your smart packing strategy should focus on multipurpose items and weather-ready gear. Carry a daypack equipped with essentials: a MetroCard, portable charger, water bottle, and weather protection.

Don't forget UV protection and travel-sized toiletries for unexpected needs. Layer your clothing strategically, wearing bulkier items during travel to maximize luggage space.

Choose odor-resistant materials like merino wool to reduce laundry needs, and plan your outfits in advance to streamline your daily adventures throughout the city. Additionally, moving cross country can provide a unique experience and broaden your perspective as you explore your new surroundings.

Conclusion

Just like Dorothy discovered in Oz, your first week in New York will be transformative. You're now equipped with the essentials: from your MetroCard to your weather apps, neighborhood knowledge to emergency contacts. While the city's energy might feel overwhelming at first, you've got the tools to navigate this concrete jungle confidently. Take it one block at a time, and you'll soon find yourself calling this dynamic metropolis home.

Start packing your kitchen by organizing essential items three to four weeks before moving day. You'll want to begin with rarely used items like crystal and special occasion dishes, then work your way to everyday necessities. Pack fragile items with bubble wrap and packing paper, placing heavier items at the bottom of boxes. Create a survival kit with basic cooking equipment and disposable alternatives. Proper planning and organization techniques will guarantee your kitchen change goes smoothly.

Essential Kitchen Items to Pack First

organized packing for moving

When preparing to move, starting with the least frequently used kitchen items helps create an organized packing process that won't disrupt your daily routine.

Begin your kitchen organization by carefully packing away items like vases, crystal pieces, and special-occasion serving dishes. Your packing priorities should focus on infrequently used appliances, such as blenders and mixers, storing them in their original boxes whenever possible.

Next, tackle specialty items including baking supplies, cake stands, and fine glassware.

Don't forget to secure any specialty utensils and picture frames. As you pack these non-essential items, label each box clearly with its contents.

Remember to keep cords and accessories together in their original bags, and use sturdy boxes for appliances to guarantee everything arrives safely at your new home. Additionally, organizing important documents related to your move will help ensure a smoother transition when you arrive.

Smart Strategies for Organizing Your Kitchen

Moving beyond your initial packing tasks, a well-organized kitchen strategy will streamline your entire relocation process.

Start by analyzing your new kitchen layout and mapping out zones for cooking essentials, which you'll mark with sticky notes on cabinets and drawers. Position frequently used items near their point of use - dishware close to the dishwasher, pots adjacent to the stove, and utensils within easy reach of your prep area.

You'll want to maximize vertical space by installing wall-mounted racks for pots and pans, while using stackable containers and adjustable shelving to optimize storage.

Keep your countertops clear except for daily-use appliances, and create a mobile cleaning station that you can easily move around. Additionally, early planning and organization can help you reduce moving costs and ensure a smoother transition to your new kitchen.

This systematic approach will help you maintain efficiency in your new kitchen from day one.

Protecting Fragile Kitchenware and Glassware

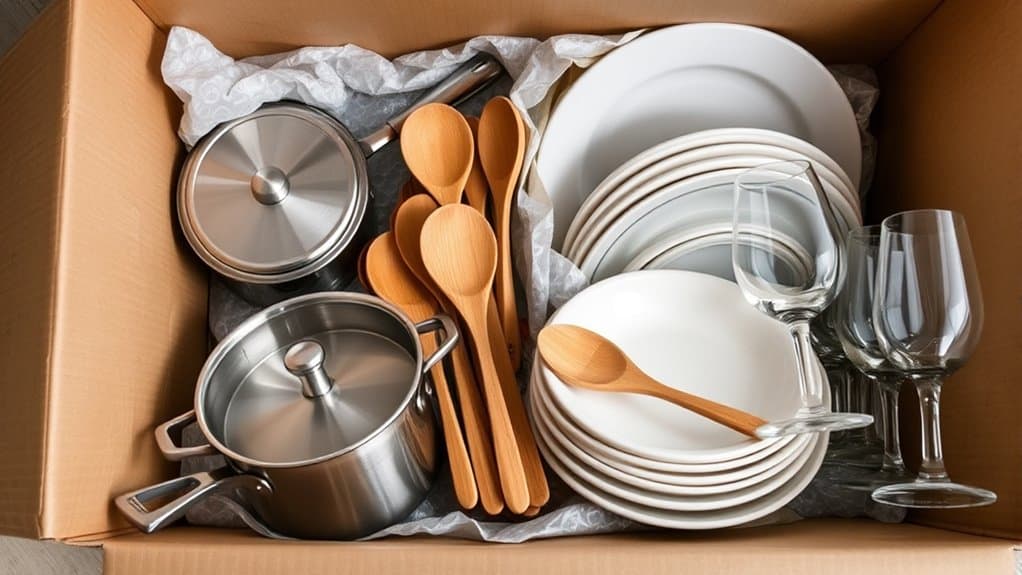
When it comes to protecting your fragile kitchen items, you'll need to decide between bubble wrap and packing paper as your primary cushioning material, with bubble wrap offering superior protection for your most delicate pieces.

You'll want to pack your boxes strategically, placing heavier items at the bottom and using dividers or custom compartments to prevent items from shifting during transport.

For maximum protection, start with a layer of packing paper wrapped tightly around each item, followed by a layer of bubble wrap, ensuring there's no direct contact between pieces. Additionally, employing safe packing techniques can help safeguard your kitchenware during the journey.

Bubble Wrap vs. Paper

Two essential packing materials stand at the forefront of kitchen moving supplies: bubble wrap and packing paper. While both serve important roles, they offer distinct benefits for different items.

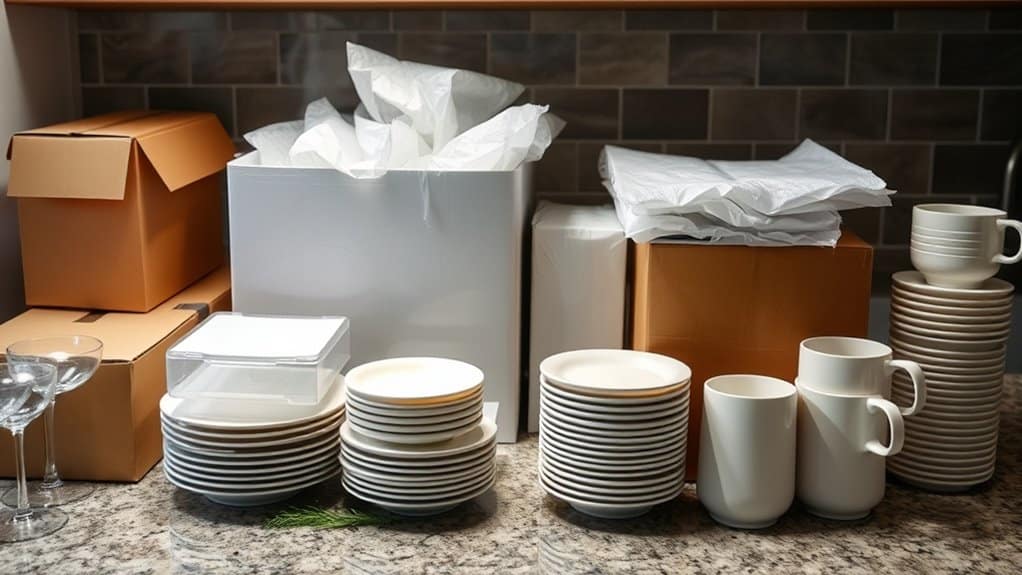
Bubble wrap's air-filled cushioning provides superior protection for your most fragile pieces, making it ideal for glassware, crystal, and valuable dishes that can't risk breakage during transit.

Packing paper advantages include cost-effectiveness, environmental friendliness, and space efficiency. You'll find it perfect for wrapping plates, non-fragile utensils, and everyday kitchenware.

It's also excellent for filling empty spaces in boxes to prevent items from shifting. For the most effective packing strategy, combine both materials: use bubble wrap for your delicate items and packing paper for standard kitchen goods.

This approach guarantees maximum protection while maintaining reasonable moving costs. Additionally, following packing guidelines will further minimize the risk of damage during your long-distance move.

Strategic Box Placement

Strategic box placement serves as the foundation for protecting your valuable kitchenware during a move. When you're packing, focus on box weight distribution by positioning heavier items like Dutch ovens and large pots at the bottom. This creates a stable base while preventing crushing damage to lighter items above.

You'll want to implement vertical stacking methods for plates and glassware, which greatly reduces breakage risk. Stand plates on their edges rather than laying them flat, and use cardboard dividers between rows.

Group similar items together, keeping pots with pots and glassware with glassware, while maintaining separation between metal and glass items. Remember to distribute weight evenly across the box floor to prevent tilting during transport and make sure your handles don't strain under uneven pressure.

Wrapping Layer by Layer

Properly wrapping your fragile kitchenware requires a methodical, layer-by-layer approach to assure maximum protection during your move.

Using the right wrapping materials and layering techniques will guarantee your delicate items arrive intact at your destination.

  1. Start with a double layer of packing paper for each piece, placing the item in the center and carefully folding the corners before securing with tape.
  2. Add bubble cushioning as your second protective barrier, especially for expensive chinaware and delicate glassware.
  3. Create cushioning layers between items using crumpled paper or foam inserts, maintaining vertical orientation whenever possible.

Remember to position heavier items at the bottom of your boxes and lighter pieces on top.

Fill any gaps with additional padding to prevent shifting during transport, and always reinforce box seams with strong packing tape.

Proper Handling of Kitchen Appliances

careful packing and loading

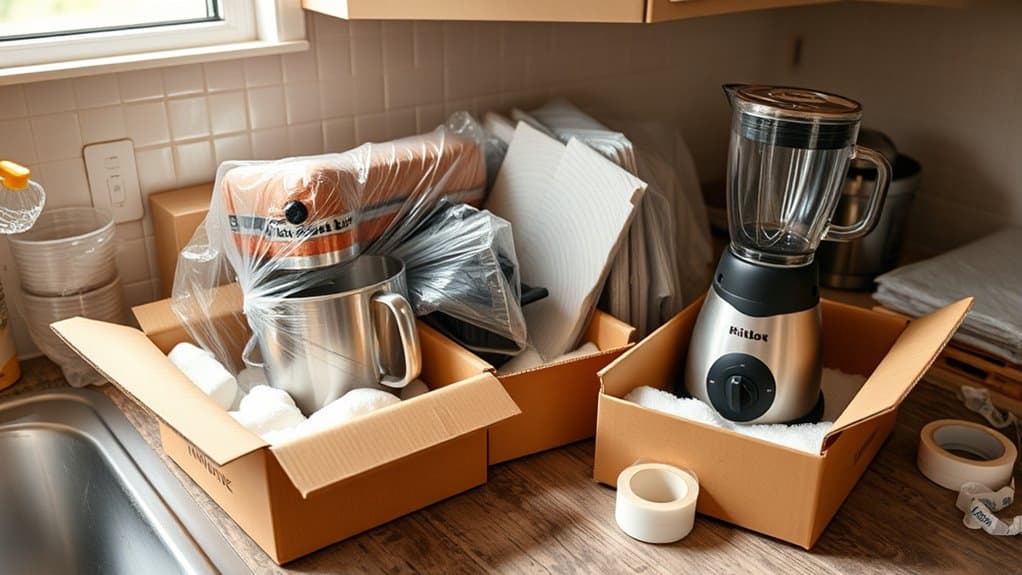
Moving kitchen appliances requires careful attention to detail and proper preparation to guarantee they arrive safely at your new home. Before packing, thoroughly clean and dry each appliance, then follow manufacturer-specific appliance disassembly tips for removing loose components.

You'll need to choose appropriate packing materials - compare standard cardboard boxes with specialized appliance containers to ascertain adequate protection. Start by wrapping individual parts in bubble wrap or foam sheets, paying special attention to fragile components.

Place heavier appliances in sturdy boxes first, filling empty spaces with crumpled paper to prevent movement. Label each box clearly with contents and handling instructions, and create an inventory list for easy tracking.

When loading, position appliance boxes at the bottom of your moving container, avoiding stacking heavy items on top of them.

Managing Food and Pantry Items

Your kitchen's food items need careful planning before your move, and you'll want to start managing your pantry stock at least three to four weeks ahead.

You can begin by creating a timeline for consuming perishables and deciding which non-perishable items you'll transport to your new home.

To stay organized, sort your essential food items into categories based on expiration dates and storage requirements, making sure to keep only what's practical for the move.

Plan Your Food Timeline

Since planning meals and managing pantry items can make or break your moving experience, creating a strategic food timeline becomes essential for a smooth shift.

Start by conducting a thorough food inventory and mapping out your meal timeline for the weeks leading up to your move.

  1. Begin consuming perishables 2-3 weeks before moving day, focusing on refrigerated items first and incorporating them into your planned meals.
  2. Schedule simple, ingredient-depleting recipes in the final two weeks, using your "first in, first out" policy to minimize waste.
  3. Create designated zones in your pantry for moving day essentials, and pack shelf-stable items in clearly labeled, airtight containers as you gradually empty your kitchen.

Remember to maintain portion control and avoid new grocery purchases during the final week before relocation.

Reduce Pantry Stock Early

Managing pantry stock effectively requires three critical steps that should begin at least six weeks before your move date.

First, conduct a thorough pantry inventory, checking expiration dates and setting aside items that won't survive the move.

Next, create a plan to consume your perishables and short-dated items through meal planning and creative recipes.

You'll want to organize food donations for unexpired items you can't take with you. Contact local food banks and shelters to arrange drop-offs of canned goods and other non-perishables that are still safe to consume.

For remaining items with at least six months until expiration, pack them in sturdy, airtight containers.

Don't forget to keep essential pantry staples accessible for quick meals during your first days in your new home.

Organize Essential Food Items

Beyond sorting through your pantry stock, a systematic approach to organizing remaining food items will make your move smoother and more efficient.

Start by implementing effective pantry organization strategies that focus on categorizing items by type and food expiration dates. You'll want to create clear sections for non-perishables, canned goods, and dried foods.

  1. Group similar items together (grains with grains, canned vegetables with canned vegetables) and label containers clearly with contents and expiration dates.
  2. Create an inventory list of items you'll keep, noting quantities and expiration dates to prevent waste.
  3. Pack shelf-stable items in small, manageable boxes, ensuring heavier items are placed at the bottom and lighter ones on top.

This organized approach will help you track what you have and make unpacking easier at your new home.

Creating Your Kitchen Survival Kit

While your kitchen items are packed away during a move, you'll need a carefully planned survival kit to maintain some normalcy in your daily routine.

Start by gathering essential kitchen essentials for basic meal prepping, including a large pot, saucepan, and basic utensils. You'll want to pack one set of dining items per person, along with disposable alternatives for convenience.

Don't forget to stock up on pantry staples that don't require refrigeration, such as bottled water, granola bars, and instant coffee.

Include cleaning supplies like disinfectant wipes and paper towels to maintain hygiene during your relocation.

Finally, pack multipurpose tools like a Swiss Army knife and duct tape for unexpected situations.

Store everything in an easily accessible container that you'll keep separate from your main moving boxes.

Best Packing Materials and Methods

securely pack kitchen items

Selecting the right packing materials and implementing proper methods can make or break your kitchen move. Your material selection should prioritize sturdy cardboard boxes, bubble wrap, and quality packing tape to guarantee maximum protection during transit.

When applying proper packing techniques, you'll want to focus on preventing breakage and maintaining organization throughout the process.

  1. Start with bubble wrap and packing peanuts for your fragile items, wrapping each piece individually and placing dishes upright to minimize pressure points.
  2. Utilize non-conventional cushioning like pillowcases and linens to wrap bowls and utensils, saving money while maintaining protection.
  3. Reinforce your boxes by applying multiple layers of tape on the bottom and parallel edges, then clearly label contents and fragility status.

Remember to double-pack especially delicate items in nested boxes for extra security during your move.

Conclusion

Your kitchen represents the heart of your home, and packing it requires the same care you'd give to wrapping a precious heirloom. By following these organized packing strategies, you'll transform the challenging task of moving your kitchen into a manageable journey. Like a well-choreographed dance, each item finds its proper place in labeled boxes, ensuring that when you arrive at your new home, you're ready to create memories around your familiar table once again.

What Are Some Tips for Moving to a New City with Children?

Moving to los angeles with children can be a daunting task, but some tips can ease the process. Firstly, involve your children in the planning and decision-making to make them feel included. Research the new city's schools, parks, and activities to ensure a smooth transition. Prioritize finding a family-friendly neighborhood and join local parent groups for support and advice. Lastly, maintain open communication and address any concerns your children may have to help them adjust to their new environment.

Moving to San Francisco with Children

  Often described as vibrant, and fantastic, San Francisco is a great city to move to with children. With its small size of almost 47 square miles, you have everything you need to raise children in this dynamic, and multi cultural city. moving with kidsLike New York, San Francisco is one of the most expensive cities in the world, and you’ll pay high prices in housing to live in this city. But for many, nothing beats living in San Francisco! Depending on the needs of your family, San Francisco offers many child friendly areas to live where your family will discover the hidden gems of this city.

Outdoor activities

San Francisco is an outdoor adventurers paradise. There is so much to do and see. Depending on the ages of your children, there is something for all ages. Take a walk across the famous Golden Gate Bridge or through the Golden Gate Park, which is full of activities for children. Parks and greenery surround San Francisco. On a clear day, visit the beach or take stroll through one of the neighborhoods, or through Chinatown. San Francisco boasts some of the finest children’s museums, for both after school and vacation fun. There’s always something to do! And soon enough you’ll be part of a community of familiar faces. San Francisco offers some of the top rated schools, and once your children are ready for university, San Francisco is home to three of the most notable universities.

Why Should I Hire Professional Packers Instead of Choosing a Moving Company Based on Their Screening Process?

When it comes to relocating, opting for professional packers for hire can prove to be a wise decision. While choosing a moving company based solely on their screening process may seem sufficient, hiring trained packers ensures that your belongings are properly packed and protected. They possess the expertise to handle delicate or valuable items, reducing the risk of damage during transit. Entrusting this task to professionals can alleviate your stress and leave you more time to focus on other aspects of your move.

What Should I Look for When Hiring Full Service Movers?

When hiring full service movers, it's crucial to prioritize hassle-free moving services. Look for companies that offer comprehensive solutions, including packing, loading, transportation, and unloading. Ensure they have proper licensing and insurance to protect your belongings during the move. Additionally, check customer reviews, get accurate cost estimates, and inquire about any additional services or fees. Ultimately, choosing reputable movers with a focus on providing hassle-free moving services will make your relocation smoother and stress-free.

Screening Moving Companies

  Moving home can often require having to hire a professional moving company to transport your belongings, either locally or across the country. Naturally, you want to be guaranteed that the company you hire will provide the best service possible. moving between LA and NYTo choose the right moving company for your move, it’s a good idea to screen any company you are considering. As the moving industry continues to grow, unfortunately, moving scams do occasionally happen. To avoid hiring a fraudulent moving company and being a victim of a scam, check each company thoroughly! Start by finding moving companies that service your area and are able to deliver to your new destination. Friends, family, coworkers or the Internet are good places to get recommendations.

Reliable moving company

Look at the website of each moving company for professionalism and services offered. Any reputable moving company will have their DOT number available. Check licensing and insurance of all the companies you are considering. Read customer reviews and check company ratings with the Better Business Bureau (BBB). Once you have done your research, eliminate any company that is not satisfactory. Speaking with the moving companies you have shortlisted, and receiving written estimates is the next process in screening the moving companies you’re thinking of hiring. Ask as many questions as needed to make sure you understand was your move involves.
Previous Tag: moving the garage
Next Tag: moving to la
David Barroso
David Barroso
Jan 10, 2025

CA NY Express Movers and Eric Rummel, the account executive, provided exceptional assistance during my move. They ensured that I received the best price and that the entire process Read more testimonials

Katelyn R.
Katelyn R.
Jan 16, 2025

We used CA-NY Express last month to move from NYC to LA and had a great experience. We had never made a cross-country move before and didn't know what to expect, Read more testimonials

Daniel Zaltsman
Daniel Zaltsman
Mar 17, 2025

Second time using them for a cross-country move, and would use them the third time too. Solid, communicative, fairly priced. Thanks to the whole team! Read more testimonials

Back to top