
Start packing your kitchen by organizing essential items three to four weeks before moving day. You'll want to begin with rarely used items like crystal and special occasion dishes, then work your way to everyday necessities. Pack fragile items with bubble wrap and packing paper, placing heavier items at the bottom of boxes. Create a survival kit with basic cooking equipment and disposable alternatives. Proper planning and organization techniques will guarantee your kitchen change goes smoothly.
Essential Kitchen Items to Pack First
When preparing to move, starting with the least frequently used kitchen items helps create an organized packing process that won't disrupt your daily routine.
Begin your kitchen organization by carefully packing away items like vases, crystal pieces, and special-occasion serving dishes. Your packing priorities should focus on infrequently used appliances, such as blenders and mixers, storing them in their original boxes whenever possible.
Next, tackle specialty items including baking supplies, cake stands, and fine glassware.
Don't forget to secure any specialty utensils and picture frames. As you pack these non-essential items, label each box clearly with its contents.
Remember to keep cords and accessories together in their original bags, and use sturdy boxes for appliances to guarantee everything arrives safely at your new home. Additionally, organizing important documents related to your move will help ensure a smoother transition when you arrive.
Smart Strategies for Organizing Your Kitchen
Moving beyond your initial packing tasks, a well-organized kitchen strategy will streamline your entire relocation process.
Start by analyzing your new kitchen layout and mapping out zones for cooking essentials, which you'll mark with sticky notes on cabinets and drawers. Position frequently used items near their point of use - dishware close to the dishwasher, pots adjacent to the stove, and utensils within easy reach of your prep area.
You'll want to maximize vertical space by installing wall-mounted racks for pots and pans, while using stackable containers and adjustable shelving to optimize storage.
Keep your countertops clear except for daily-use appliances, and create a mobile cleaning station that you can easily move around. Additionally, early planning and organization can help you reduce moving costs and ensure a smoother transition to your new kitchen.
This systematic approach will help you maintain efficiency in your new kitchen from day one.
Protecting Fragile Kitchenware and Glassware
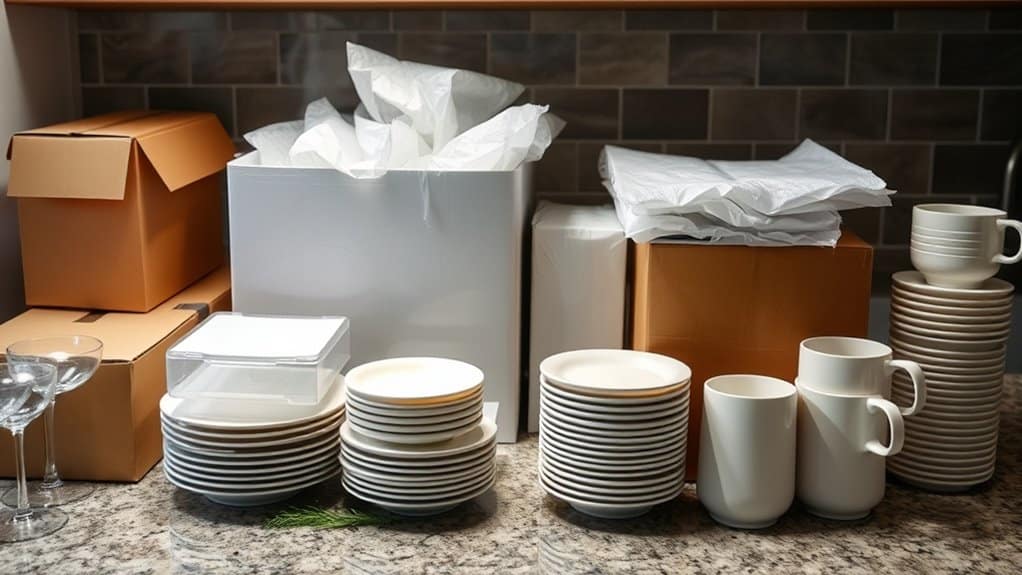
When it comes to protecting your fragile kitchen items, you'll need to decide between bubble wrap and packing paper as your primary cushioning material, with bubble wrap offering superior protection for your most delicate pieces.
You'll want to pack your boxes strategically, placing heavier items at the bottom and using dividers or custom compartments to prevent items from shifting during transport.
For maximum protection, start with a layer of packing paper wrapped tightly around each item, followed by a layer of bubble wrap, ensuring there's no direct contact between pieces. Additionally, employing safe packing techniques can help safeguard your kitchenware during the journey.
Bubble Wrap vs. Paper
Two essential packing materials stand at the forefront of kitchen moving supplies: bubble wrap and packing paper. While both serve important roles, they offer distinct benefits for different items.
Bubble wrap's air-filled cushioning provides superior protection for your most fragile pieces, making it ideal for glassware, crystal, and valuable dishes that can't risk breakage during transit.
Packing paper advantages include cost-effectiveness, environmental friendliness, and space efficiency. You'll find it perfect for wrapping plates, non-fragile utensils, and everyday kitchenware.
It's also excellent for filling empty spaces in boxes to prevent items from shifting. For the most effective packing strategy, combine both materials: use bubble wrap for your delicate items and packing paper for standard kitchen goods.
This approach guarantees maximum protection while maintaining reasonable moving costs. Additionally, following packing guidelines will further minimize the risk of damage during your long-distance move.
Strategic Box Placement
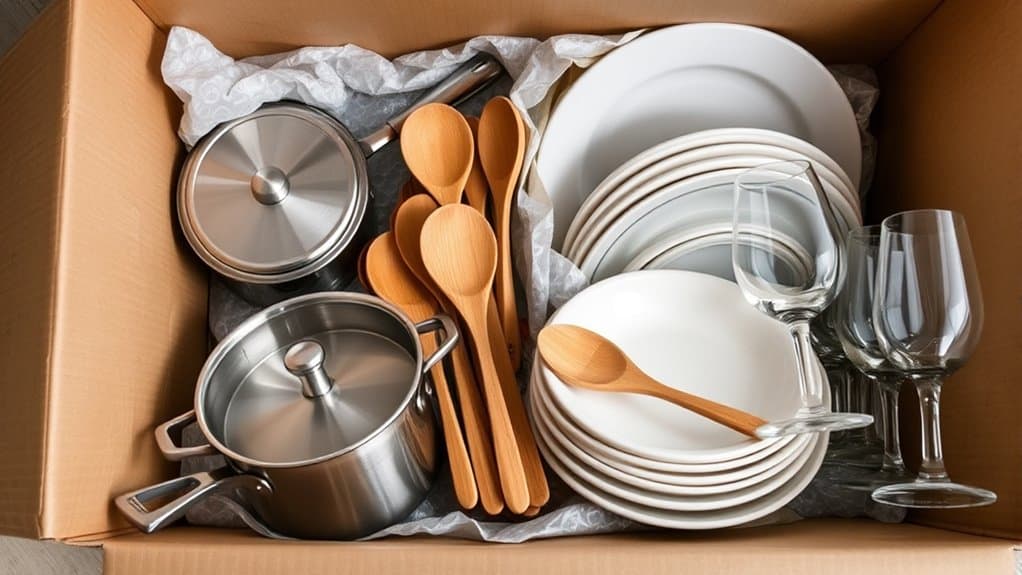
Strategic box placement serves as the foundation for protecting your valuable kitchenware during a move. When you're packing, focus on box weight distribution by positioning heavier items like Dutch ovens and large pots at the bottom. This creates a stable base while preventing crushing damage to lighter items above.
You'll want to implement vertical stacking methods for plates and glassware, which greatly reduces breakage risk. Stand plates on their edges rather than laying them flat, and use cardboard dividers between rows.
Group similar items together, keeping pots with pots and glassware with glassware, while maintaining separation between metal and glass items. Remember to distribute weight evenly across the box floor to prevent tilting during transport and make sure your handles don't strain under uneven pressure.
Wrapping Layer by Layer
Properly wrapping your fragile kitchenware requires a methodical, layer-by-layer approach to assure maximum protection during your move.
Using the right wrapping materials and layering techniques will guarantee your delicate items arrive intact at your destination.
- Start with a double layer of packing paper for each piece, placing the item in the center and carefully folding the corners before securing with tape.
- Add bubble cushioning as your second protective barrier, especially for expensive chinaware and delicate glassware.
- Create cushioning layers between items using crumpled paper or foam inserts, maintaining vertical orientation whenever possible.
Remember to position heavier items at the bottom of your boxes and lighter pieces on top.
Fill any gaps with additional padding to prevent shifting during transport, and always reinforce box seams with strong packing tape.
Proper Handling of Kitchen Appliances
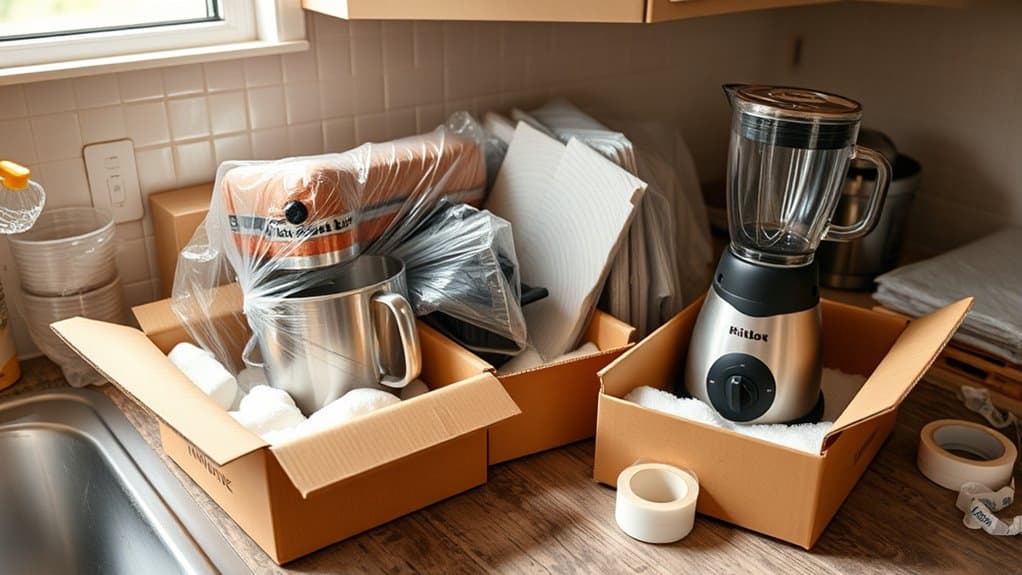
Moving kitchen appliances requires careful attention to detail and proper preparation to guarantee they arrive safely at your new home. Before packing, thoroughly clean and dry each appliance, then follow manufacturer-specific appliance disassembly tips for removing loose components.
You'll need to choose appropriate packing materials - compare standard cardboard boxes with specialized appliance containers to ascertain adequate protection. Start by wrapping individual parts in bubble wrap or foam sheets, paying special attention to fragile components.
Place heavier appliances in sturdy boxes first, filling empty spaces with crumpled paper to prevent movement. Label each box clearly with contents and handling instructions, and create an inventory list for easy tracking.
When loading, position appliance boxes at the bottom of your moving container, avoiding stacking heavy items on top of them.
Managing Food and Pantry Items
Your kitchen's food items need careful planning before your move, and you'll want to start managing your pantry stock at least three to four weeks ahead.
You can begin by creating a timeline for consuming perishables and deciding which non-perishable items you'll transport to your new home.
To stay organized, sort your essential food items into categories based on expiration dates and storage requirements, making sure to keep only what's practical for the move.
Plan Your Food Timeline
Since planning meals and managing pantry items can make or break your moving experience, creating a strategic food timeline becomes essential for a smooth shift.
Start by conducting a thorough food inventory and mapping out your meal timeline for the weeks leading up to your move.
- Begin consuming perishables 2-3 weeks before moving day, focusing on refrigerated items first and incorporating them into your planned meals.
- Schedule simple, ingredient-depleting recipes in the final two weeks, using your "first in, first out" policy to minimize waste.
- Create designated zones in your pantry for moving day essentials, and pack shelf-stable items in clearly labeled, airtight containers as you gradually empty your kitchen.
Remember to maintain portion control and avoid new grocery purchases during the final week before relocation.
Reduce Pantry Stock Early
Managing pantry stock effectively requires three critical steps that should begin at least six weeks before your move date.
First, conduct a thorough pantry inventory, checking expiration dates and setting aside items that won't survive the move.
Next, create a plan to consume your perishables and short-dated items through meal planning and creative recipes.
You'll want to organize food donations for unexpired items you can't take with you. Contact local food banks and shelters to arrange drop-offs of canned goods and other non-perishables that are still safe to consume.
For remaining items with at least six months until expiration, pack them in sturdy, airtight containers.
Don't forget to keep essential pantry staples accessible for quick meals during your first days in your new home.
Organize Essential Food Items
Beyond sorting through your pantry stock, a systematic approach to organizing remaining food items will make your move smoother and more efficient.
Start by implementing effective pantry organization strategies that focus on categorizing items by type and food expiration dates. You'll want to create clear sections for non-perishables, canned goods, and dried foods.
- Group similar items together (grains with grains, canned vegetables with canned vegetables) and label containers clearly with contents and expiration dates.
- Create an inventory list of items you'll keep, noting quantities and expiration dates to prevent waste.
- Pack shelf-stable items in small, manageable boxes, ensuring heavier items are placed at the bottom and lighter ones on top.
This organized approach will help you track what you have and make unpacking easier at your new home.
Creating Your Kitchen Survival Kit
While your kitchen items are packed away during a move, you'll need a carefully planned survival kit to maintain some normalcy in your daily routine.
Start by gathering essential kitchen essentials for basic meal prepping, including a large pot, saucepan, and basic utensils. You'll want to pack one set of dining items per person, along with disposable alternatives for convenience.
Don't forget to stock up on pantry staples that don't require refrigeration, such as bottled water, granola bars, and instant coffee.
Include cleaning supplies like disinfectant wipes and paper towels to maintain hygiene during your relocation.
Finally, pack multipurpose tools like a Swiss Army knife and duct tape for unexpected situations.
Store everything in an easily accessible container that you'll keep separate from your main moving boxes.
Best Packing Materials and Methods
Selecting the right packing materials and implementing proper methods can make or break your kitchen move. Your material selection should prioritize sturdy cardboard boxes, bubble wrap, and quality packing tape to guarantee maximum protection during transit.
When applying proper packing techniques, you'll want to focus on preventing breakage and maintaining organization throughout the process.
- Start with bubble wrap and packing peanuts for your fragile items, wrapping each piece individually and placing dishes upright to minimize pressure points.
- Utilize non-conventional cushioning like pillowcases and linens to wrap bowls and utensils, saving money while maintaining protection.
- Reinforce your boxes by applying multiple layers of tape on the bottom and parallel edges, then clearly label contents and fragility status.
Remember to double-pack especially delicate items in nested boxes for extra security during your move.
Conclusion
Your kitchen represents the heart of your home, and packing it requires the same care you'd give to wrapping a precious heirloom. By following these organized packing strategies, you'll transform the challenging task of moving your kitchen into a manageable journey. Like a well-choreographed dance, each item finds its proper place in labeled boxes, ensuring that when you arrive at your new home, you're ready to create memories around your familiar table once again.


